
Introduction
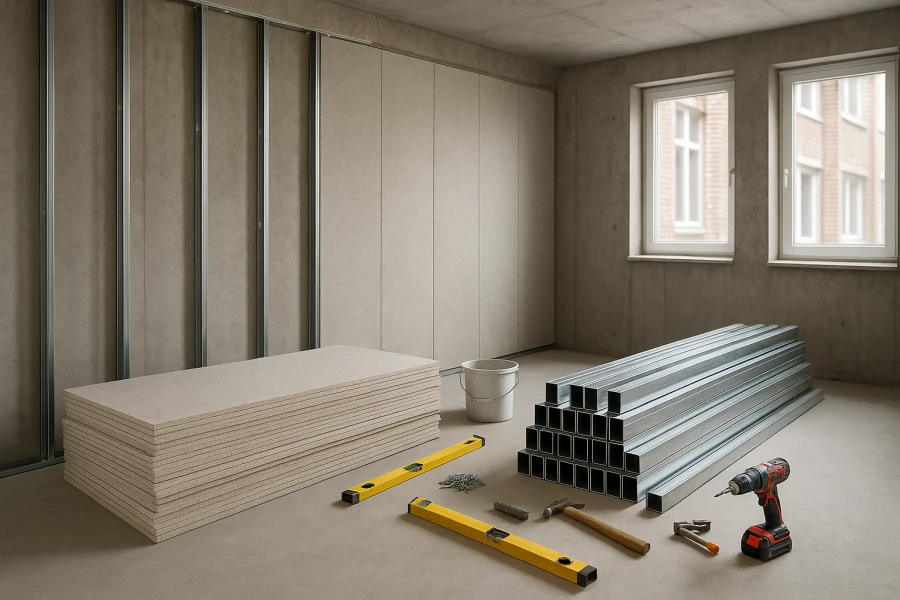
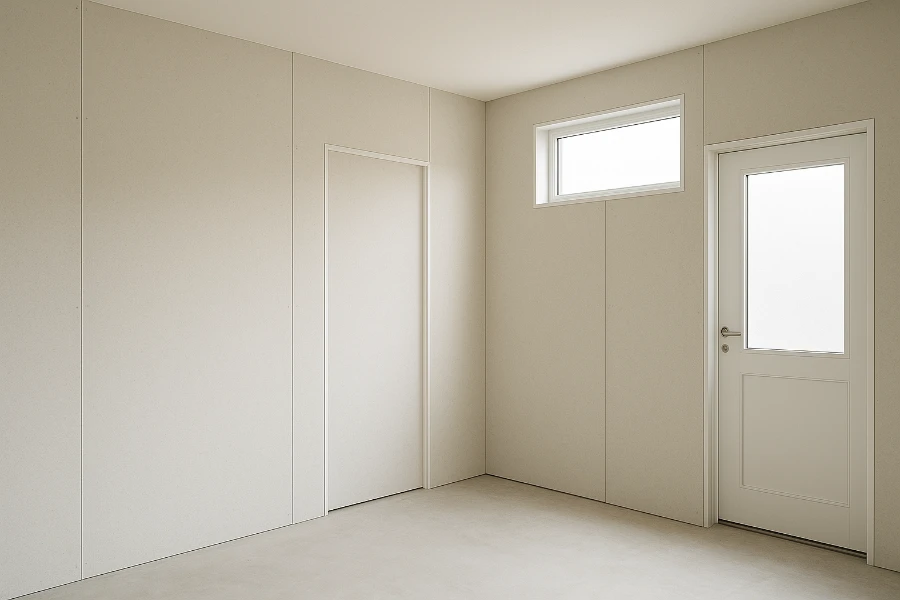
In modern construction, MGO board installation has become a preferred choice for creating durable, fire-resistant, and eco-friendly interior partition walls. Compared with traditional gypsum boards, magnesium oxide (MGO) boards offer higher strength, better moisture resistance, and improved fire performance.
This guide explains the MGO board installation process step by step. It will help builders, contractors, and DIY enthusiasts understand the correct procedures, avoid common mistakes, and ensure high-quality results.
1. Site Preparation
Proper MGO board installation begins with thorough site preparation. Ensuring the site is ready helps prevent issues during installation and guarantees a smooth, high-quality finish. Follow these steps carefully:
1.1 Construction Sequence
Install MGO boards for interior walls only after the exterior wall construction is complete. Avoid starting interior installation before the exterior walls or windows are installed, as this can compromise wall alignment and structural stability.
1.2 Pipeline Completion
Complete all major pipeline and utility installations on each floor before beginning MGO board installation. This ensures that no rework or adjustments will interfere with the boards once they are fixed.
1.3 Site Cleaning
Thoroughly clean the installation area. Remove dirt, dust, oil, debris, and any leftover cement. Level any uneven ground as needed to provide a flat, stable surface for the boards. A clean substrate is essential for proper adhesion and alignment during MGO board installation.
1.4 Dry Environment
Keep the installation site dry. No standing water should remain on the floor, as moisture can affect board integrity and compromise the overall installation quality.
1.5 Temperature Control
Ensure that joint and board installation occurs within a temperature range of 5°C to 35°C. Installing outside this range may affect the board performance and the curing of joint compounds.
2. Material Inspection
Before starting MGO board installation, it is crucial to inspect all materials to ensure quality, prevent installation issues, and achieve a professional finish. Follow these steps:
2.1 Verify Material Type and Quantity
Check the type, specifications, and quantity of all materials before installation. Confirm that the MGO boards, lightweight steel keels, screws, and joint compounds match the project requirements. Accurate verification helps avoid delays and ensures smooth workflow during MGO board installation.
2.2 Inspect MGO Boards
Ensure that all MGO boards are dry, flat, and free from damage or surface bulges. Damaged or warped boards can compromise alignment and structural integrity, so only boards meeting quality standards should be used.
2.3 Check Lightweight Steel Keels
Lightweight steel keels must be smooth, rust-free, and free from distortion. Any bent or corroded keels can affect wall stability and make MGO board installation more difficult.
2.4 Inspect Joint Compound
Joint compound must be dry, clump-free, and not damp. Properly prepared compound ensures smooth joints, effective adhesion, and a high-quality finish in the final MGO wall installation.
3. Wall Positioning
Accurate wall positioning is a critical step in ensuring a smooth and precise MGO board installation. Follow these guidelines:
Determine the wall location according to the design specifications.
Mark lines on the floor slab, beam bottom, and ground to indicate the positions of the top and bottom horizontal keels.
Clearly mark the positions of doors and windows to ensure proper alignment during installation.
Proper wall positioning helps maintain structural accuracy, ensures consistent spacing for keels, and provides a reliable framework for the subsequent MGO board installation steps.
4. Keel Installation
Proper keel installation provides the essential framework for a stable and precise MGO board installation. Follow these detailed steps:
4.1 Secure Horizontal Keels
Fix the top and bottom horizontal keels to the building structure and floor using expansion screws, shot nails, or other suitable fasteners.
Ensure that adjacent fasteners are spaced no more than 600mm apart to maintain stability.
4.2 Cut and Insert Vertical Keels
Measure the distance between the top and bottom horizontal keels and cut vertical keels accordingly, leaving a 5mm margin for easier fitting.
Insert vertical keels into the horizontal keels, keeping the orientation consistent. Avoid upside-down placement to ensure proper alignment.
4.3 Adjust Cut Ends and Spacing
If cutting vertical keels is necessary, place the cut end facing upward during insertion.
Follow design specifications for vertical keel spacing: standard is 600mm, but it can also be set at 400mm or 300mm if required, without exceeding 600mm.
4.4 Check Verticality
Use a plumb line to confirm that vertical keels are perpendicular.
4.5 Temporary Keel Adjustment
Do not fix horizontal and vertical keels permanently immediately. Adjust keels during the MGO board installation to align with board tolerances.
4.6 Install First Layer of MGO Boards
Install one layer of MGO boards on one side of the keel frame.
4.7 Final Keel Alignment
Adjust horizontal and vertical keels as needed during board installation.
The keels can be fixed permanently while the MGO boards are being installed, ensuring proper alignment.
4.8 Internal Wall Pipe Check
Complete the installation and inspection of internal wall pipes before installing MGO boards on the opposite side.
5. Door and Window Openings
Accurate reinforcement around door and window openings is essential to maintain structural integrity during MGO board installation. Follow these steps carefully:
5.1 Break Horizontal Keels
At doorway positions, break the horizontal keel to allow for proper frame construction.
5.2 Install Vertical Keels
Place additional vertical keels on both sides of door and window openings.
Ensure the keels are oriented with the opening facing away from the frame to maintain stability.
5.3 Frame Construction
Use additional horizontal keels to create the frames for door and window openings.
Insert vertical keels between horizontal keels to maintain uniform spacing with other wall keels.
For doors or windows wider than 1800mm, reinforce the structure to prevent sagging or misalignment during MGO board installation.
5.4 Lower Frame of Window Openings
Follow the same procedure to construct the lower frame of window openings, ensuring alignment and stability with the upper frame.
6. Reinforcement for Equipment Hanging Keels
Proper reinforcement at equipment hanging points is essential to ensure safety and stability during MGO board installation. Follow these steps:
6.1 Reinforce Designated Keels
Strengthen keels that are designated for hanging equipment according to the design specifications.
Reinforcement ensures that the wall can safely support additional weight without compromising MGO board alignment.
6.2 Install Additional Supports
At locations where equipment will be mounted, install parallel joints, thin steel bands, or other horizontal support components.
These reinforcements provide secure mounting points while maintaining wall stability during and after MGO board installation.
7. Pipe Installation
Before covering walls with MGO boards, concealed pipes and sockets must be properly installed to ensure both functionality and a smooth finish. Follow these guidelines:
Install all concealed pipes and electrical sockets from the side of the wall that has not yet been covered with MGO boards.
Ensure pipes and conduits are securely fixed and positioned according to design specifications to prevent interference during MGO board installation.
Verify alignment and spacing to maintain the structural integrity and aesthetic finish of the wall.
Proper pipe installation before board mounting ensures a clean, professional result and avoids rework after MGO board installation.
8. Insulation Installation
Installing insulation correctly is essential for thermal and acoustic performance in walls while maintaining a stable MGO board installation. Follow these steps:
8.1 Select Appropriate Insulation
Use rock wool, glass wool, or similar insulation materials suitable for interior partition walls.
8.2 Secure Insulation Properly
Install insulation firmly within the wall cavity to prevent sagging or detachment, ensuring consistent coverage.
8.3 Determine Insulation Thickness
Install insulation according to the specified thickness in the design plans.
Proper thickness ensures optimal thermal and acoustic performance while complementing the MGO board installation.
Correct insulation installation contributes to both the structural stability and the long-term efficiency of the partition wall system.
9. MGO Board Installation for Internal Walls
This step is the core of MGO board installation, ensuring wall stability, fire resistance, and a professional finish. Follow these detailed instructions:
9.1 Start Installation
Begin MGO board installation from one side of the wall, working sequentially to maintain alignment.
9.2 Board Alignment
Ensure boards naturally align with adjacent boards, leaving the design-specified gaps.
9.3 Edge Positioning
Position board edges at the center of vertical keels, with an overlap width of at least 15mm.
9.4 Elevate Bottom Edge
Lift the bottom edge (or cut edge) more than 10mm above the floor using a lifting device, avoiding direct contact with the floor.
9.5 Upper Edge Securing
Press the top edge tightly against the ceiling without gaps, except for partitions that do not require sound or fire protection.
9.6 Vertical Installation with Staggered Joints
Install single-layer MGO boards on both sides of the keel vertically with staggered joints.
9.7 Stagger Transverse Joints
For vertical board joints along the longer side, ensure transverse joints are staggered on both sides.
9.8 Screw Installation
Use an electric screw gun to drive self-tapping screws in a single pass.
9.9 Screw Depth
Embed screws 0.5 to 1 mm deep into the board surface without cutting through the fiberglass mesh.
9.10 Screw Edge Distance
Maintain a distance of 10–15 mm from the board edge and 15–20 mm from the cut edge.
9.11 Screw Spacing
Place screws 200 mm apart along edges and 300 mm in the center of the board.
Proper execution of this step ensures a stable and durable wall structure, providing a high-quality result in MGO board installation.
10. Joint Treatment
Proper joint treatment is essential to achieve a smooth, durable, and professional finish in MGO board installation. Follow these steps carefully:
10.1 Prepare Joint Compound
Mix the joint compound thoroughly and let it sit for 15 minutes before filling joints. Pay attention to the compound’s curing time as specified by the manufacturer.
10.2 Clean the Joints
Ensure all joints are clean and free from debris to guarantee proper adhesion of the compound.
10.3 Fill the Joints
Apply the compound into the joints, pressing it level with the board surface.
10.4 Apply Second Layer
Once the first layer has cured, apply a second layer at least 50mm wide from the joint edge to reinforce the seam.
10.5 Attach Joint Tape
Adhere joint tape over the compound, smoothing it with a putty knife. Ensure no air bubbles remain between the tape and the compound.
10.6 Align Tape Centerline
Align the centerline of the joint tape with the joint centerline to ensure even coverage and adherence on both adjacent boards.
10.7 Embed the Tape
Spread any compound squeezed from the edges over the tape, pressing firmly so the tape is fully embedded in the joint compound.
10.8 Allow to Set
Let the layer set according to the compound’s specified setting time.
10.9 Apply Third Layer
Cover the first joint treatment with another layer of joint compound, smoothing it level with the board surface. Extend the width by at least 50mm beyond the previous layer.
10.10 Set Time
Allow this layer to cure according to the product’s setting instructions.
10.11 Final Layer
Apply a third layer over the previous treatment, smoothing level with the board surface and chamfered edges. Extend coverage at least 50mm beyond the prior layer.
10.12 Sand the Surface
Once fully cured, lightly sand the surface until it is even with the board surface, ensuring a smooth finish.
10.13 Cut Edge Joints
For joints at cut edges, extend each layer of compound coverage by an additional 100mm to ensure proper reinforcement and durability.
Careful joint treatment ensures seamless walls and maximizes the quality and longevity of your MGO board installation.
11. Corner Treatment
Proper corner treatment ensures smooth, durable, and professional-looking corners in your MGO board installation. Follow these steps carefully:
11.1 Smooth Uneven Edges
Use a grinding tool to smooth any uneven cut edges at corners. Proper edge preparation ensures the corner tape adheres correctly and prevents gaps.
11.2 Apply Joint Compound
Spread joint compound along the corner and on both sides to provide a solid base for the corner tape.
11.3 Install Corner Tape
Fold the corner tape along its centerline and place it precisely over the corner.
Press firmly with a trowel to embed the tape into the compound, ensuring a strong, seamless corner finish.
Correct corner treatment enhances wall durability and contributes to the overall quality of MGO board installation, especially in areas subject to stress or impact.
12. Screw Head Treatment
Treating screw heads properly is essential for a smooth, professional finish in MGO board installation. Follow these steps:
Apply joint compound directly to all screw heads.
Press the compound firmly to ensure it fully covers the screw and blends with the board surface.
Smooth the surface carefully to maintain a level and even wall finish, preparing it for painting or other final treatments.
Proper screw head treatment not only enhances aesthetics but also prevents uneven surfaces that could affect the overall quality of your MGO board installation.
13. Material Management
Proper material management is crucial to ensure the quality and efficiency of MGO board installation. Follow these guidelines:
13.1 Reinforce Material Handling
Due to the characteristics of MGO boards and lightweight steel keels, material management should be reinforced during packaging, loading, unloading, transportation, secondary handling, and storage.
13.2 Indoor Placement
Transport and place boards and keels indoors at the installation site using mechanical lifting, ideally before the outer walls are fully enclosed.
13.3 Dry Storage
Store materials in a dry indoor environment. Keep packaging intact until use to prevent moisture damage or quality deterioration.
13.4 Follow Manufacturer Instructions
Handle and store materials according to the manufacturer’s instructions, and avoid placing items directly on the ground.
13.5 Timely Installation
MGO boards should ideally be installed upon arrival and not stored onsite for extended periods, ensuring optimal material condition and simplifying MGO board installation workflow.
Effective material management prevents damage, reduces installation issues, and ensures a high-quality MGO board installation.
14. Quality Inspection Instructions
Conducting thorough quality inspections ensures a durable, safe, and high-quality MGO board installation. Follow these steps:
14.1 Inspect Concealed Pipelines
Check the installation quality of all concealed pipelines before MGO boards are installed to prevent rework and ensure wall integrity.
14.2 Verify Materials and Placement
Confirm that all materials, placement, and structural elements meet the design requirements and specifications.
14.3 Inspect MGO Boards
Ensure the boards are flat, clean, undamaged, with joints that are smooth and tightly fitted, and that edges and corners are straight and aligned.
14.4 Compliance with Standards
All work should comply with relevant design and construction acceptance standards, ensuring safety and quality in the final installation.
Seek Expert Assistance for MGO Board Installation
If you are planning an MGO board installation or want to ensure your project achieves the highest quality and safety standards, our team of experts is ready to help.
Get professional advice on installation techniques, material handling, and best practices.
Receive guidance tailored to your project specifications, including wall types, insulation, and joint treatment.
Ensure a smooth workflow and durable, professional results with expert support.
Contact us today to discuss your project and benefit from our expertise in MGO board installation.
Latest Posts


